
Pigeon Point Lighthouse

PIGEON POINT LIGHTHOUSE
Pescadero, CA
Image by Jan Arendtsz @ www.janarendtsz.com
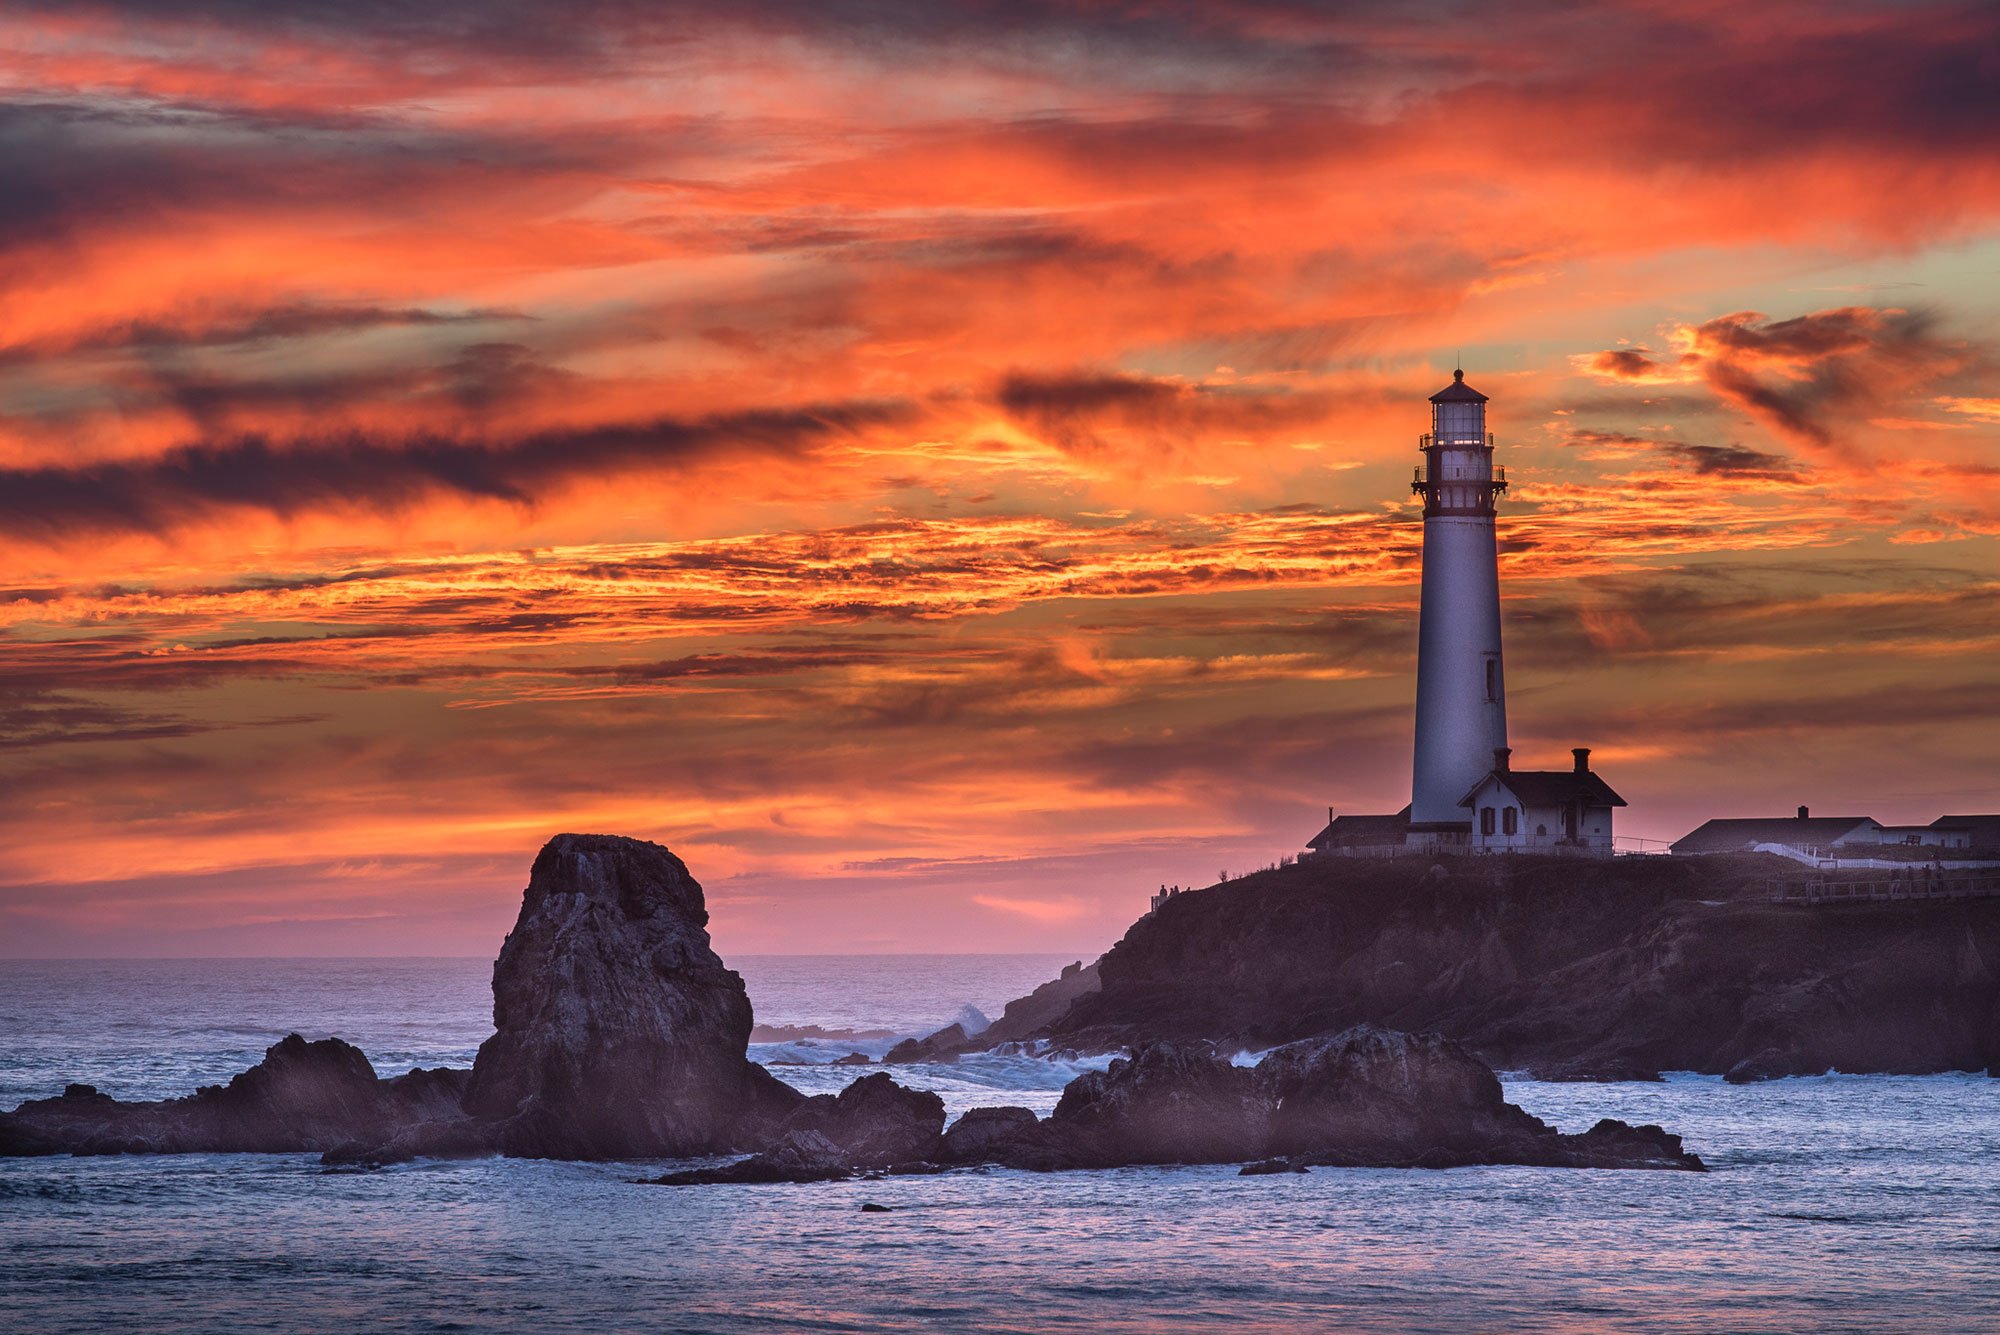
Built on a coastal cliff 50 miles south of San Francisco just past the small coastal town of Pescadero along Hwy. 1, Pigeon Point Lighthouse is picturesque lighthouse that has been in operation since 1872. It’s one of the tallest lighthouses in the country, and now uses an automated LED beacon instead of the original Fresnel lens. The lighthouse takes it name from the ship Carrier Pigeon that wrecked here in 1853.
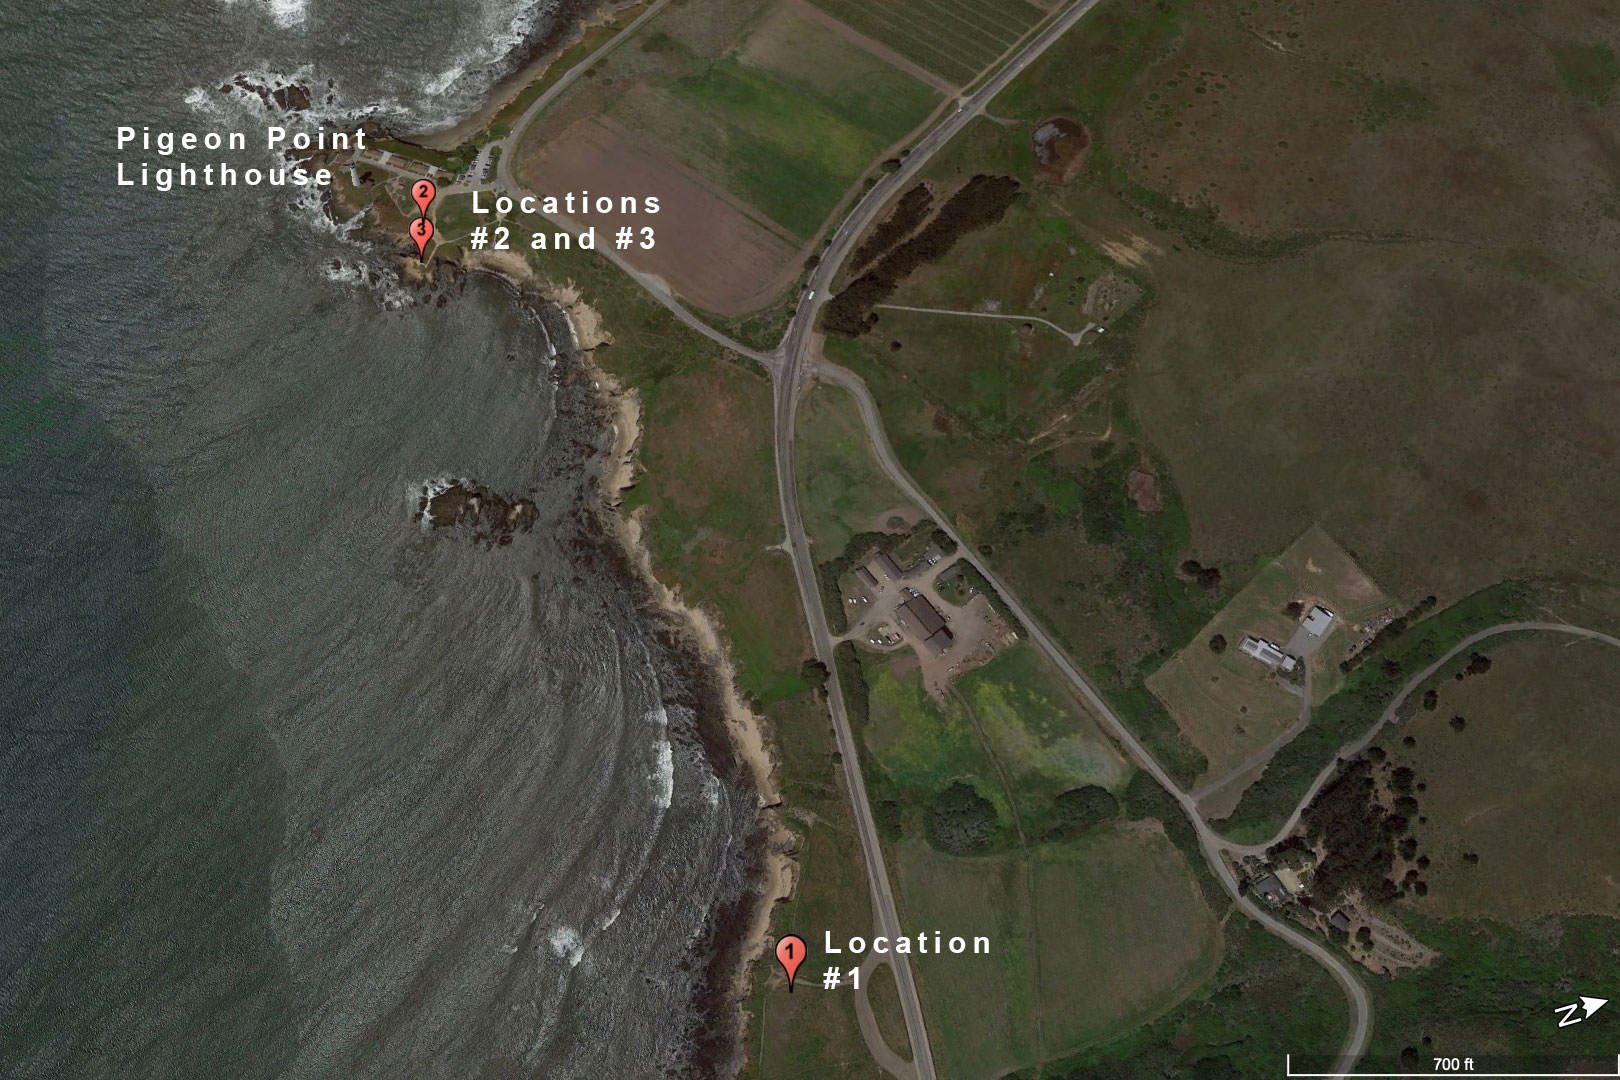
There are several different places from where you can photograph the lighthouse, from the Pigeon Point Lighthouse State Historic Park premises to a few locations on Hwy 1 that are both south andr north of the lighthouse. This image was captured from the Pigeon Point Viewpoint Parking Lot, which is about half a mile south on Hwy 1.
Photos and location summary by Jan Arendtsz
Trail Difficulty - EASY
I would rate the difficulty of this trail as a 1 on a scale of 1-5 (with 5 being most difficult).
Once you get to the Pigeon Point Viewpoint Parking, there is a short trail that skirts the coastal bluff from the gravel parking lot. This image was captured from this trail at the edge of the bluff near a very steep trail leading down to the beach below. Note that the trail going down is very steep and slippery -- my advice is not to attempt the hike down.
GPS Coordinates & Elevation
Sea Level - Elevation
View In Google earth
Download KMZ Trail File
Click Here to download the KMZ file for this location.
Directions
CLICK HERE to get driving directions to Pigeon Point Lighthouse parking area
From San Francisco - take I-280 S toward Daly City and then keep right at the fork to continue on CA-1 S/Cabrillo Hwy N for 40 miles until you get to Pigeon Point Rd. Turn right into the parking lot.
Photography Tips
Pigeon Point is a beautiful location with many interesting possibilities. As seen from the photos, the many different perspectives include shooting from a distance from the dirt parking lot past the lighthouse further south on Hwy 1, from within the premises of the lighthouse, and also several other locations further north of the lighthouse on Hwy 1.
EXIF Data
Focal Length – 200 mm
Exposure – 15 sec @ f 8.0
ISO – 100
Date – June 22nd
Time – 8:35 pm
Best Time of Day to Shoot
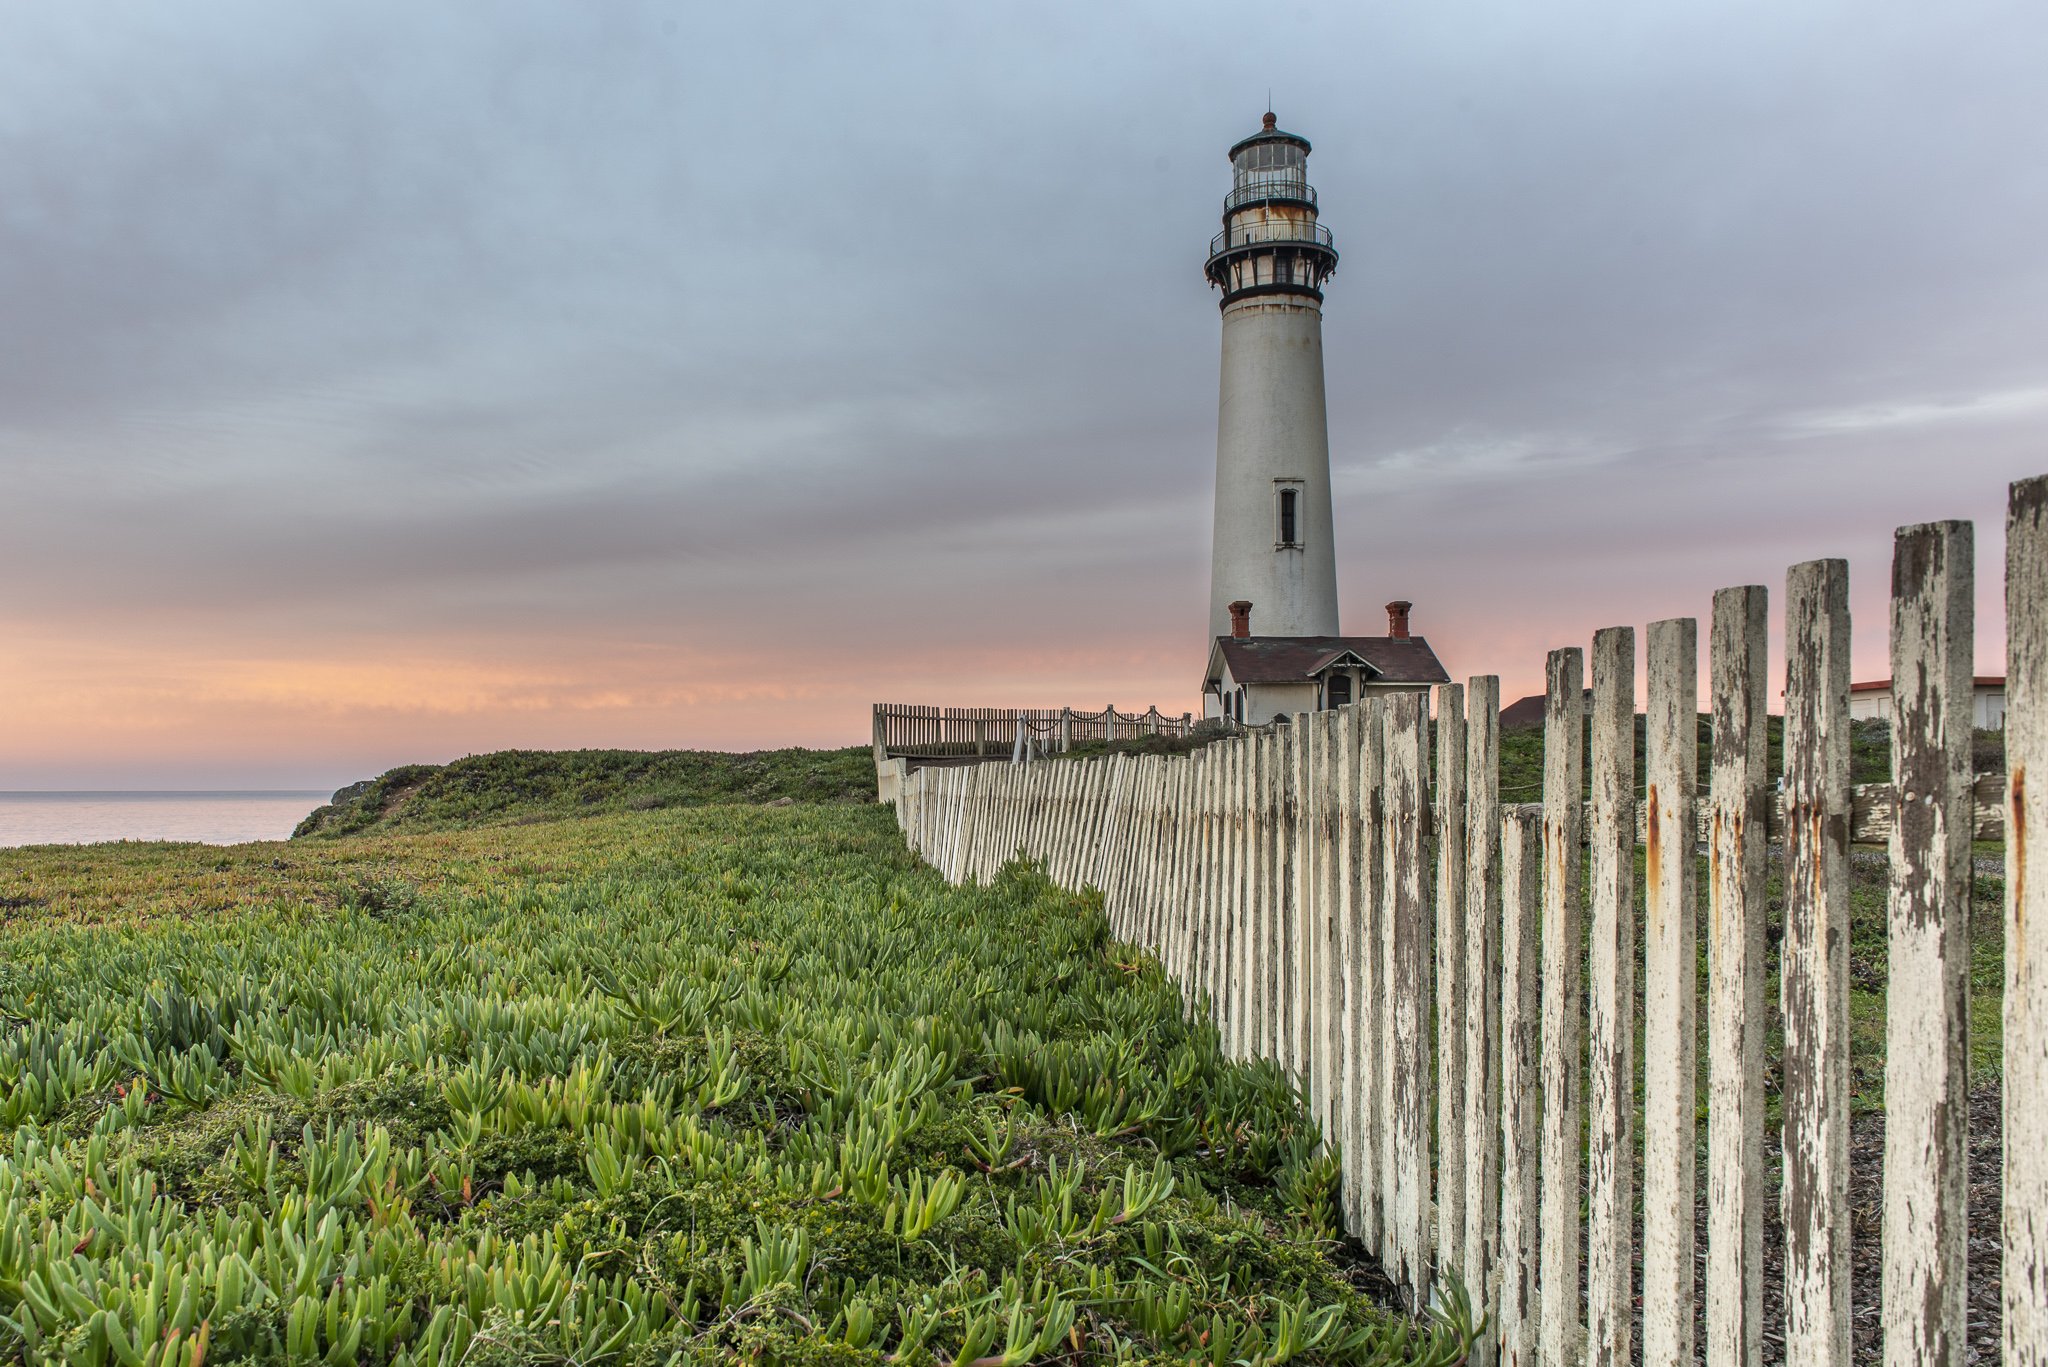
Great images can be captured at both sunrise and sunset. For sunrise, the best option is to capture images from within the lighthouse premises, such as using the white picket fence as the foreground. Typically there is a nice pink hue in the sky at sunrise. Another option for sunrise is to walk down the stairs to the small beach from within the lighthouse premises, where you can capture numerous images of the rocks formations as well as the lighthouse framed between rocks. Ensure that you arrive at least 30 mins before sunrise to make use of the best available light. However, note that you can shoot the lighthouse well after sunrise since the sun is behind you.
For sunset, my favorite location is from the dirt parking lot to the south of the lighthouse, as displayed in the main image above. This location is especially great in late fall and early winter, as the sunset is directly behind the lighthouse. Great images can also be captured from within the lighthouse premises based on cloud formations and other lighting conditions.
Best Time of Year
The best time would be in the fall or winter, especially in October and November, where the sunset can be spectacular.
This image was taken on June 22nd.
Lens(es) Needed
Given the endless locations and compositions, you should bring lenses ranging from ultra-wide to shoot close to the lighthouse to zoom lenses up to 200-300m to shoot from various locations on Hwy 1.
Location #1 was taken with a 200mm lens.
Location #2 - this image uses the white fence as a leading line in the foreground for the right half of the frame to lead to the lighthouse with the green vegetation on the left as a counterbalance. I placed the camera right next to the fence and a couple of feet above the ground to capture this perspective. Keeping the camera low to the ground is important to capture the fence in a way that it fills the frame. I used a 24mm focal length, and given the short distance to the lighthouse, this image requires an ultra or regular wide-angle lens. With an ultra-wide lens, you can fill up more of the frame with the fence for a slightly distorted perspective.
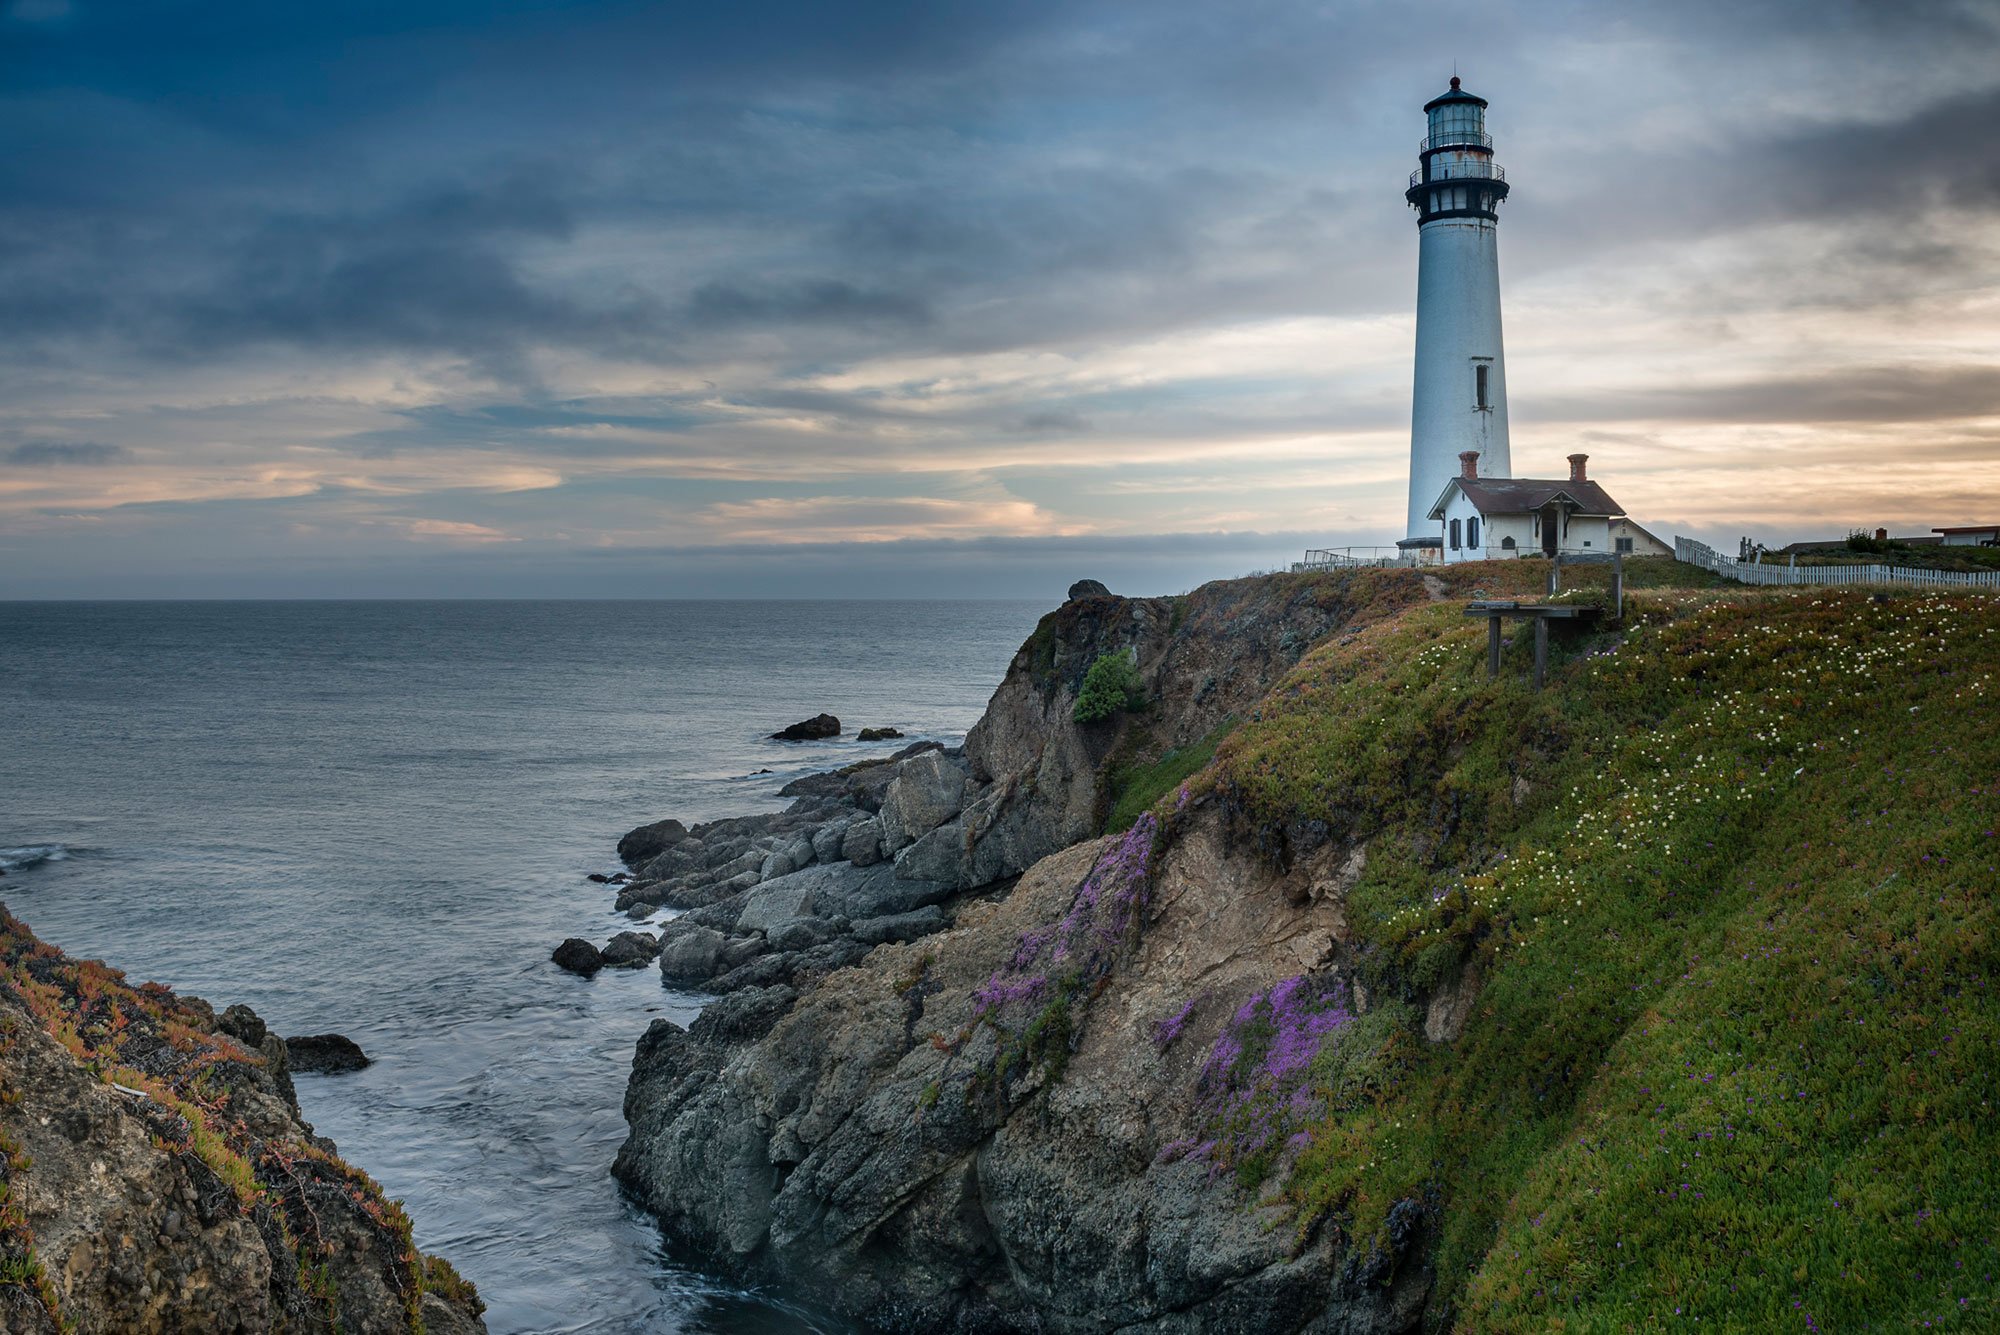
Location #3 - this image frames the lighthouse on the right third of the screen so that the middle of the image can capture the descent from the lighthouse down to the ocean and capture the little cove on the left. The image was taken towards the edge of the bluff, and there is space for slightly different compositions at various points along the pathway. I used a 24mm focal length for this image, and given the short distance to the lighthouse, these images require an ultra or regular wide-angle lens.
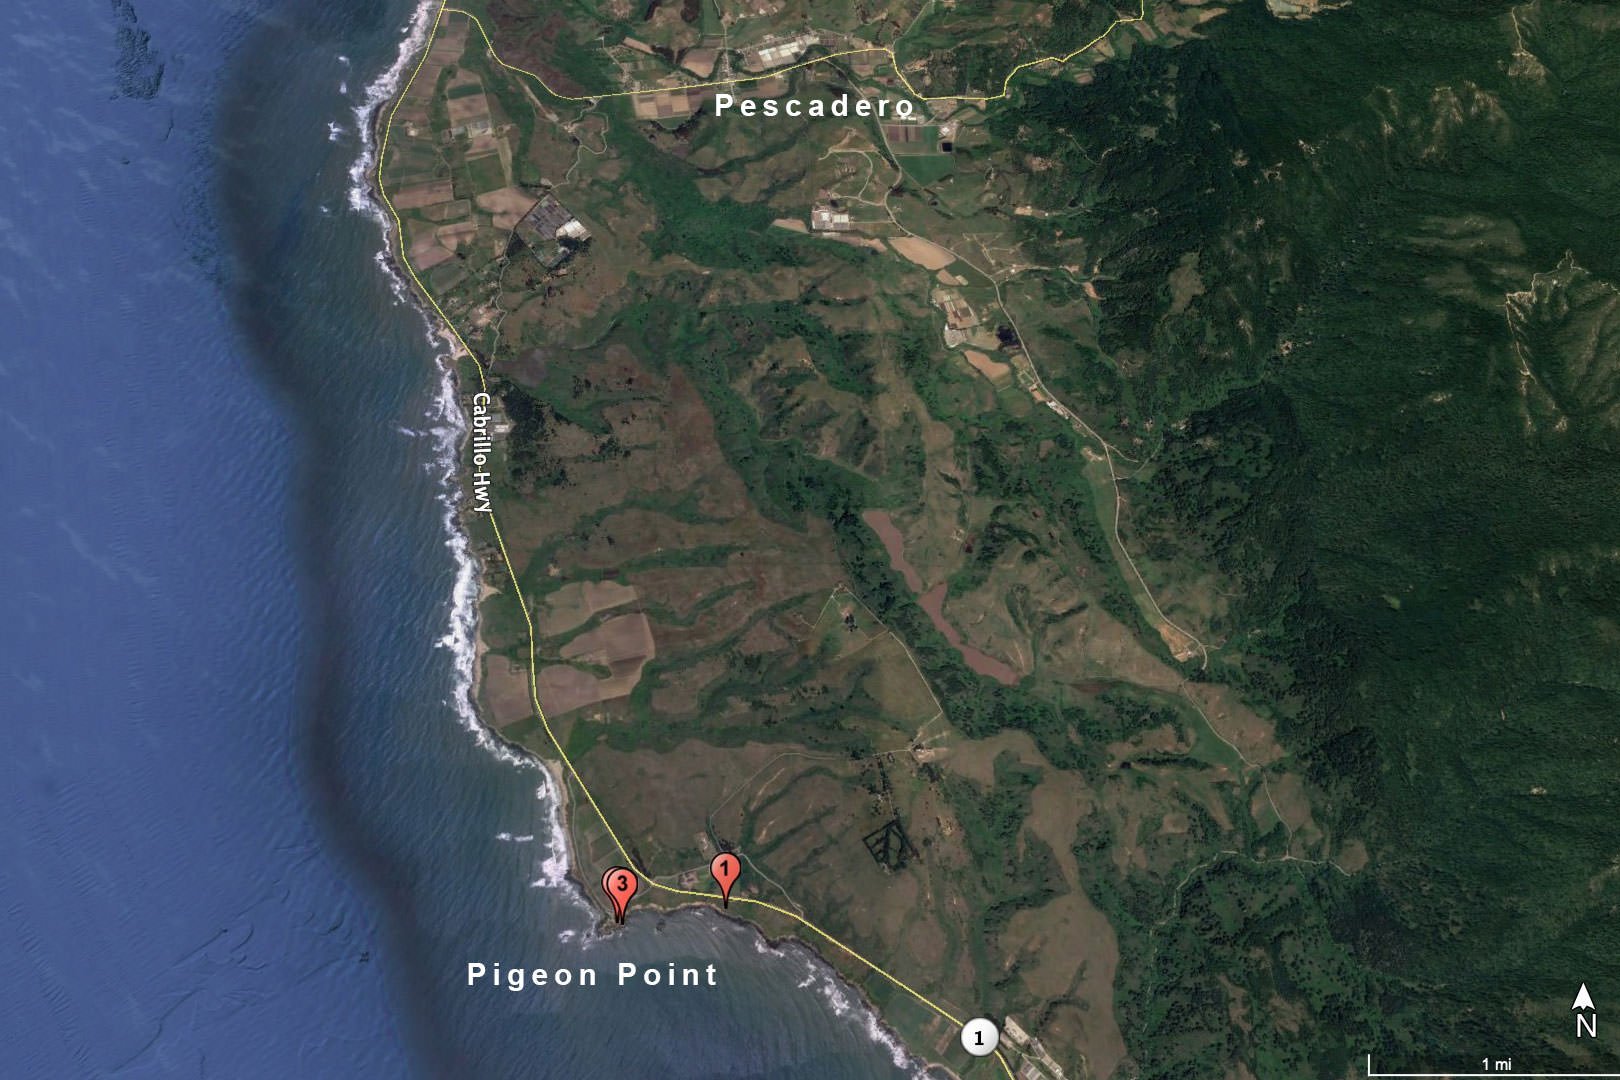
Birds-Eye View
Permits
There are no permits required.
Direction of the Shot
The direction of the shot northeast at around 260°.
Equipment Needed
Other than a sturdy tripod, there is no need for special equipment.
Number of Other Photographers to Expect
If coming at sunset, you will likely see a few other photographers as well. However, there is plenty of space since you can essentially get the same image anywhere on the short bluff trail.
Weather
The weather around is classified as warm and temperate with high’s staying within 60 & 70 year-round.
Cell Service
I have Verizon and cell service is strong at this location.
Lodging & Camping
There are a multitude of hotels and other lodging around Pescadero, CA at every price point.
Area Guides and Workshops
None
Other Resources
Pigeon Point Light Station State Historic Park - California Department of Parks and Recreation